Green Screens in Limited Space
I started streaming Overwatch, and I became picky about the quality of the video; this post describes my setup, where I run a green screen approximately 30 inches behind my desk.
I recently played in Instagrav, an Overwatch team of Facebook employees for AHGL - a charity e-sports league. I thought it would be fun to stream it, and ended up being somewhat picky about the quality of my stream.
I had a few constraints:
- limited space when in use, to not take over the entire living room
- packs away into a small space, for the same reason
Also, as I’m lazy, I wanted:
- quick set up and packing away (less than 5 minutes)
- consistent lighting: not needing to adjust camera settings depending on time of day
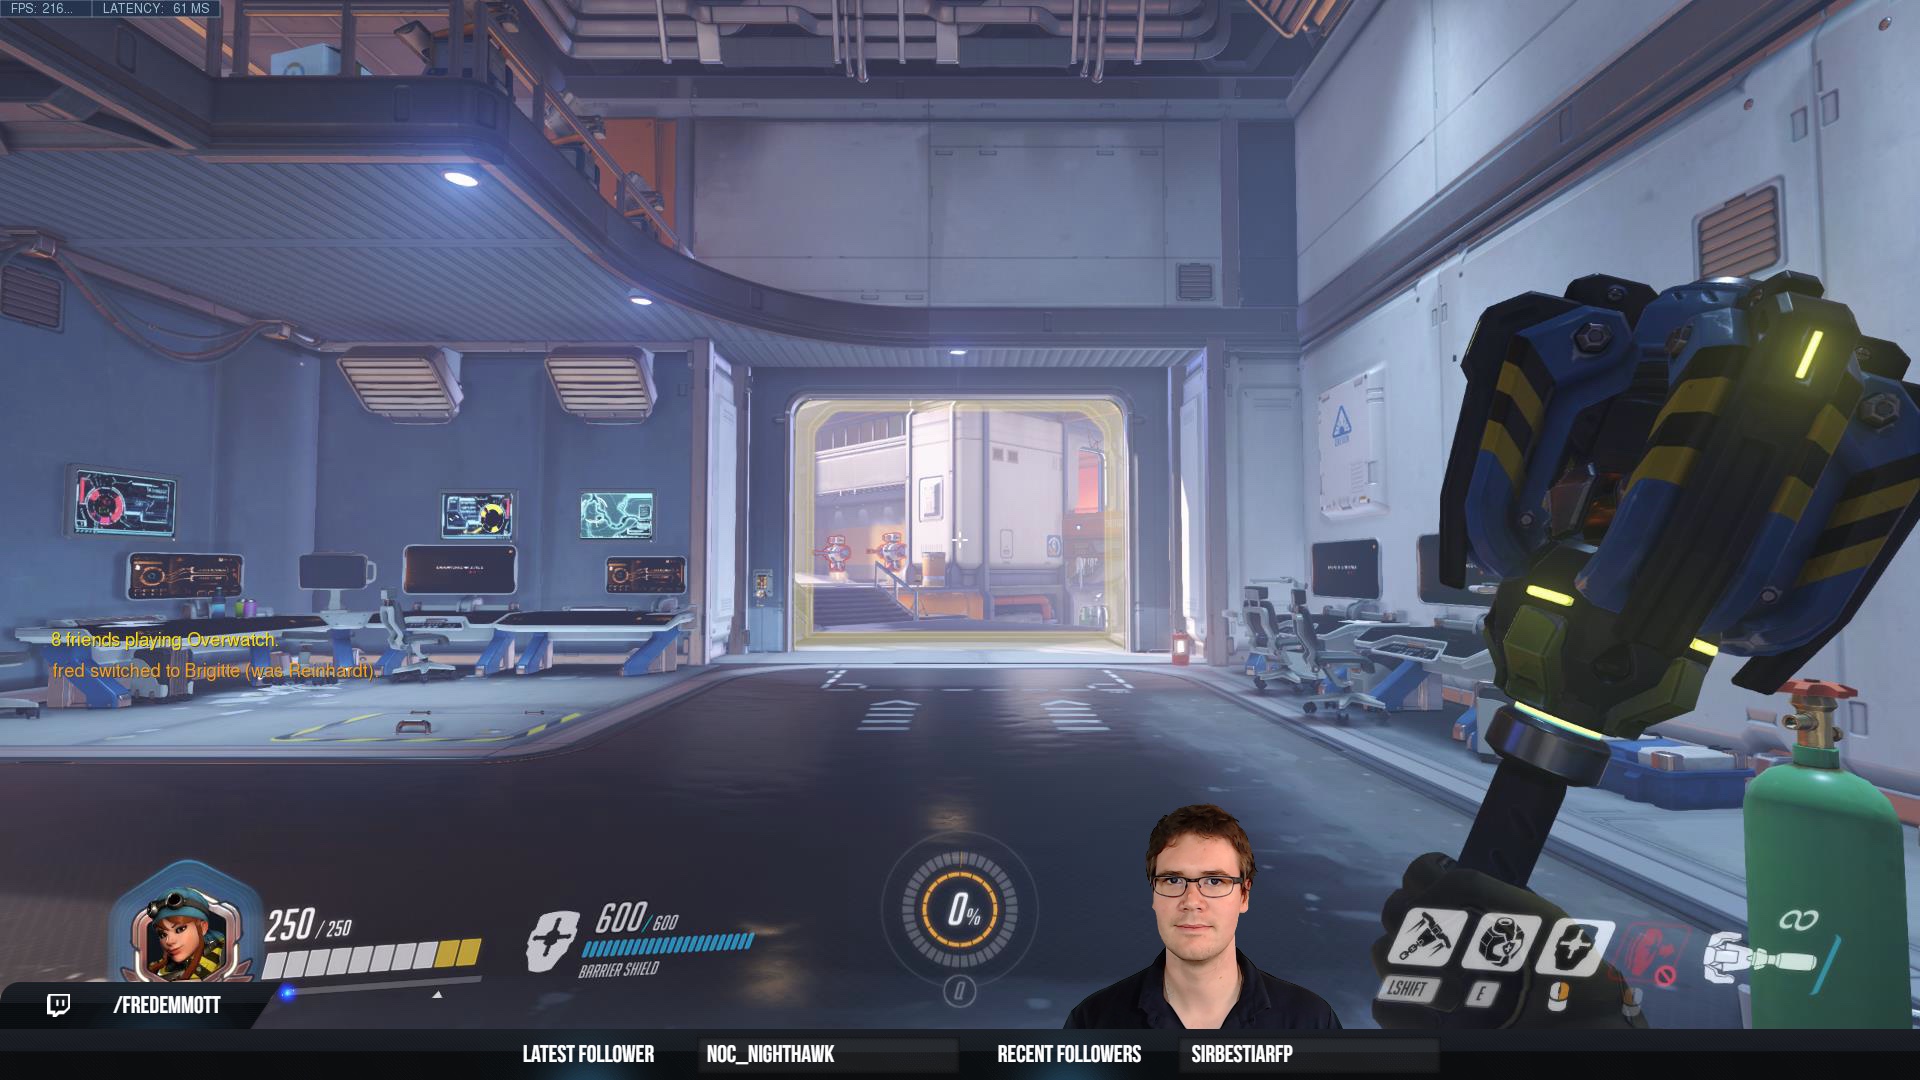
Here’s the end result:
First, the webcam itself is a Logitech G922; this actually doesn’t matter that much - the lighting is much more important. That said, the nice thing about this one is that it can run at 720p60; running the camera at the same speed as the game play it’s composited on top of is visibly nicer, but it’s subtle. This works flawlessly in OBS Studio, but I was unable to get it running well above 30fps in XSplit Broadcaster.
Configuration:
- disable ‘low light enhancement’
- disable ‘auto’ on everything; focus, white balance, exposure, etc
- set gain to 0
- for reference, I’m running with exposure set to -5, but this will depend on the specific lighting arrangement you use
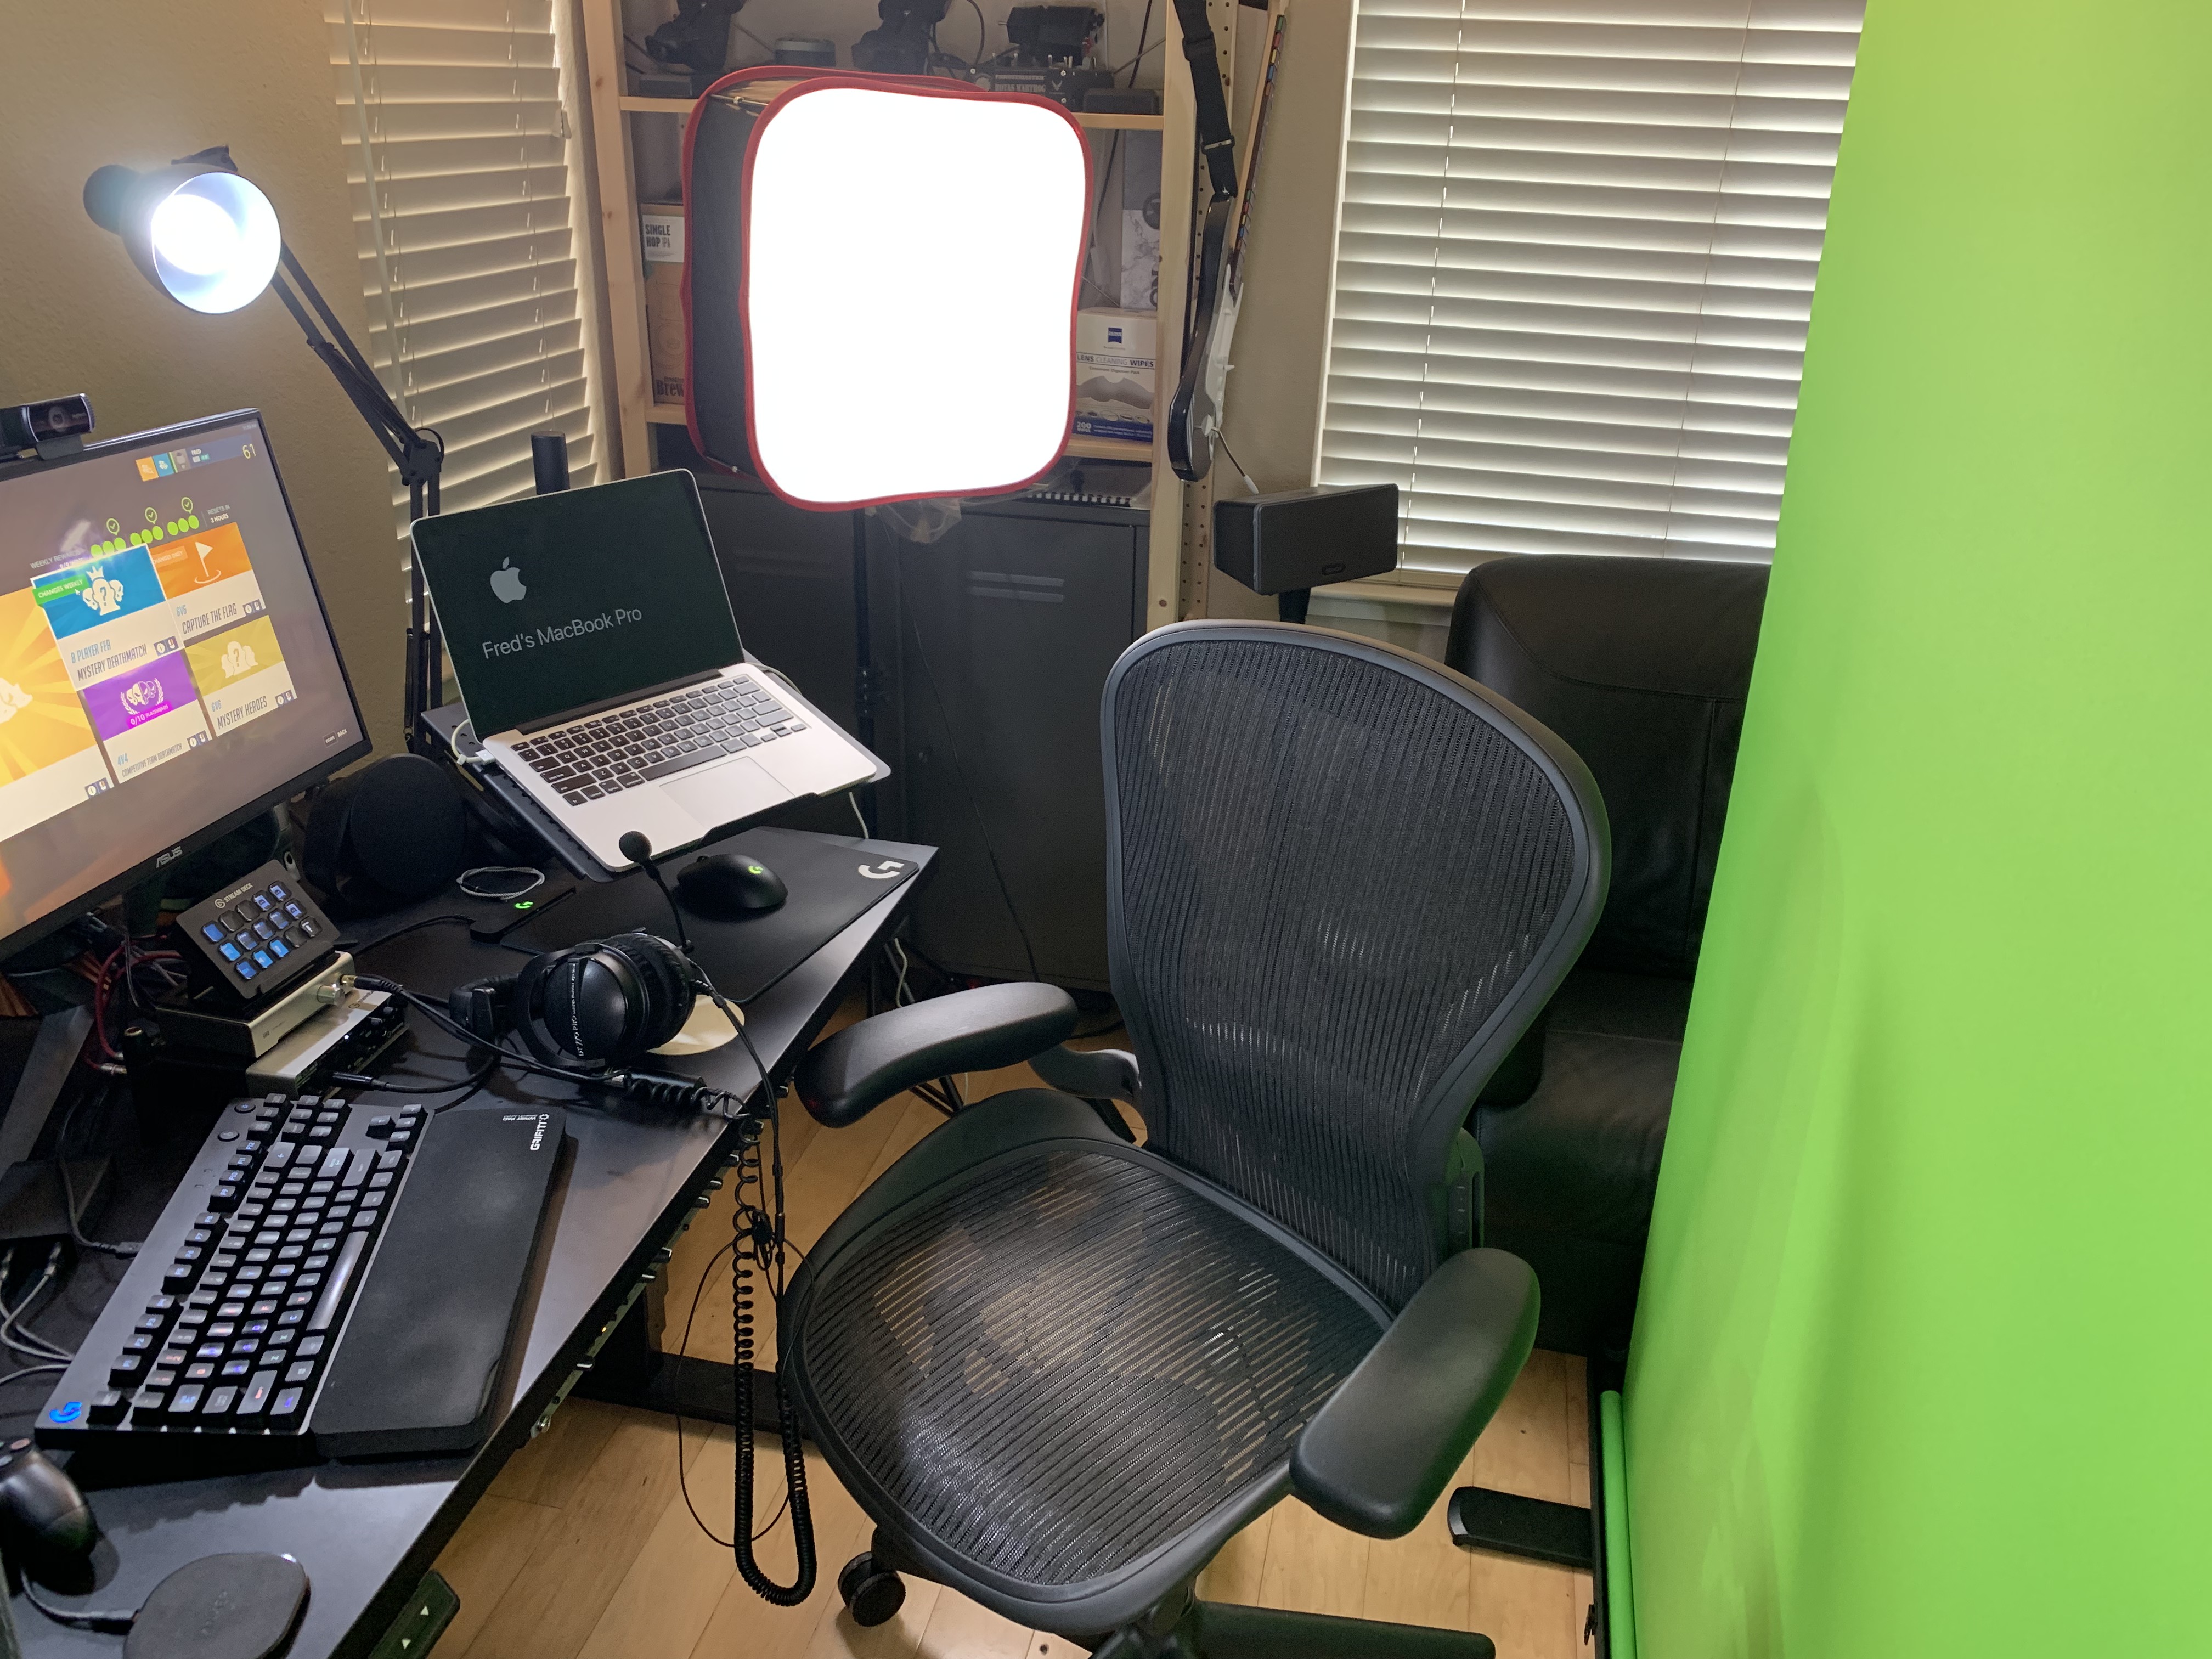
Behind me, I have an Elgato Green Screen; this sets up and tears down in a matter of seconds - just remember to spread the feet, or it’s effectively a giant sail and will blow over. It pulls straight up out of its’ storage container without effort, and is supported by hydraulics:

It’s easy to store, but Elgato’s claim that you can store it under your bed or couch seems a bit optimistic; you’ll need around 5 inches of clearance for that to work.
I’ve tried a few different ‘virtual green screen’ implementations; some do handle tracking body and face well, but they all have distracting problems with hair - flickering, or in some cases ghosting. I’ve heard that Intel RealSense cameras can do a somewhat better job of this, but I’ve not tested this.
Finally, lights: whether you are using a green screen or not, the most important thing is to light your face well; the best way to do this seems to be to have lamps on top of or behind your monitor, pointing at you. I started off using some old photography lights I had, but the stands were inconvenient, and the non-LED bulbs generated a lot of heat, making streaming for more than 30 minutes somewhat uncomfortable. I strongly recommend getting
- LED bulbs, so they’re not heating you up
- bright ‘daylight’ bulbs - I’m using 5500k LEDs
- a light that can be repositioned easily - keeping in mind that your monitor or other things on your desk might get in the way
If you don’t have much space, I think having scissor arms clamped to your desk works well; I’m using two desk clamp lamps from Amazon, though the Ikea desk lamps seem like they will work as well and are much cheaper. I then replaced the bulbs with Wsky 5500k LED bulbs.
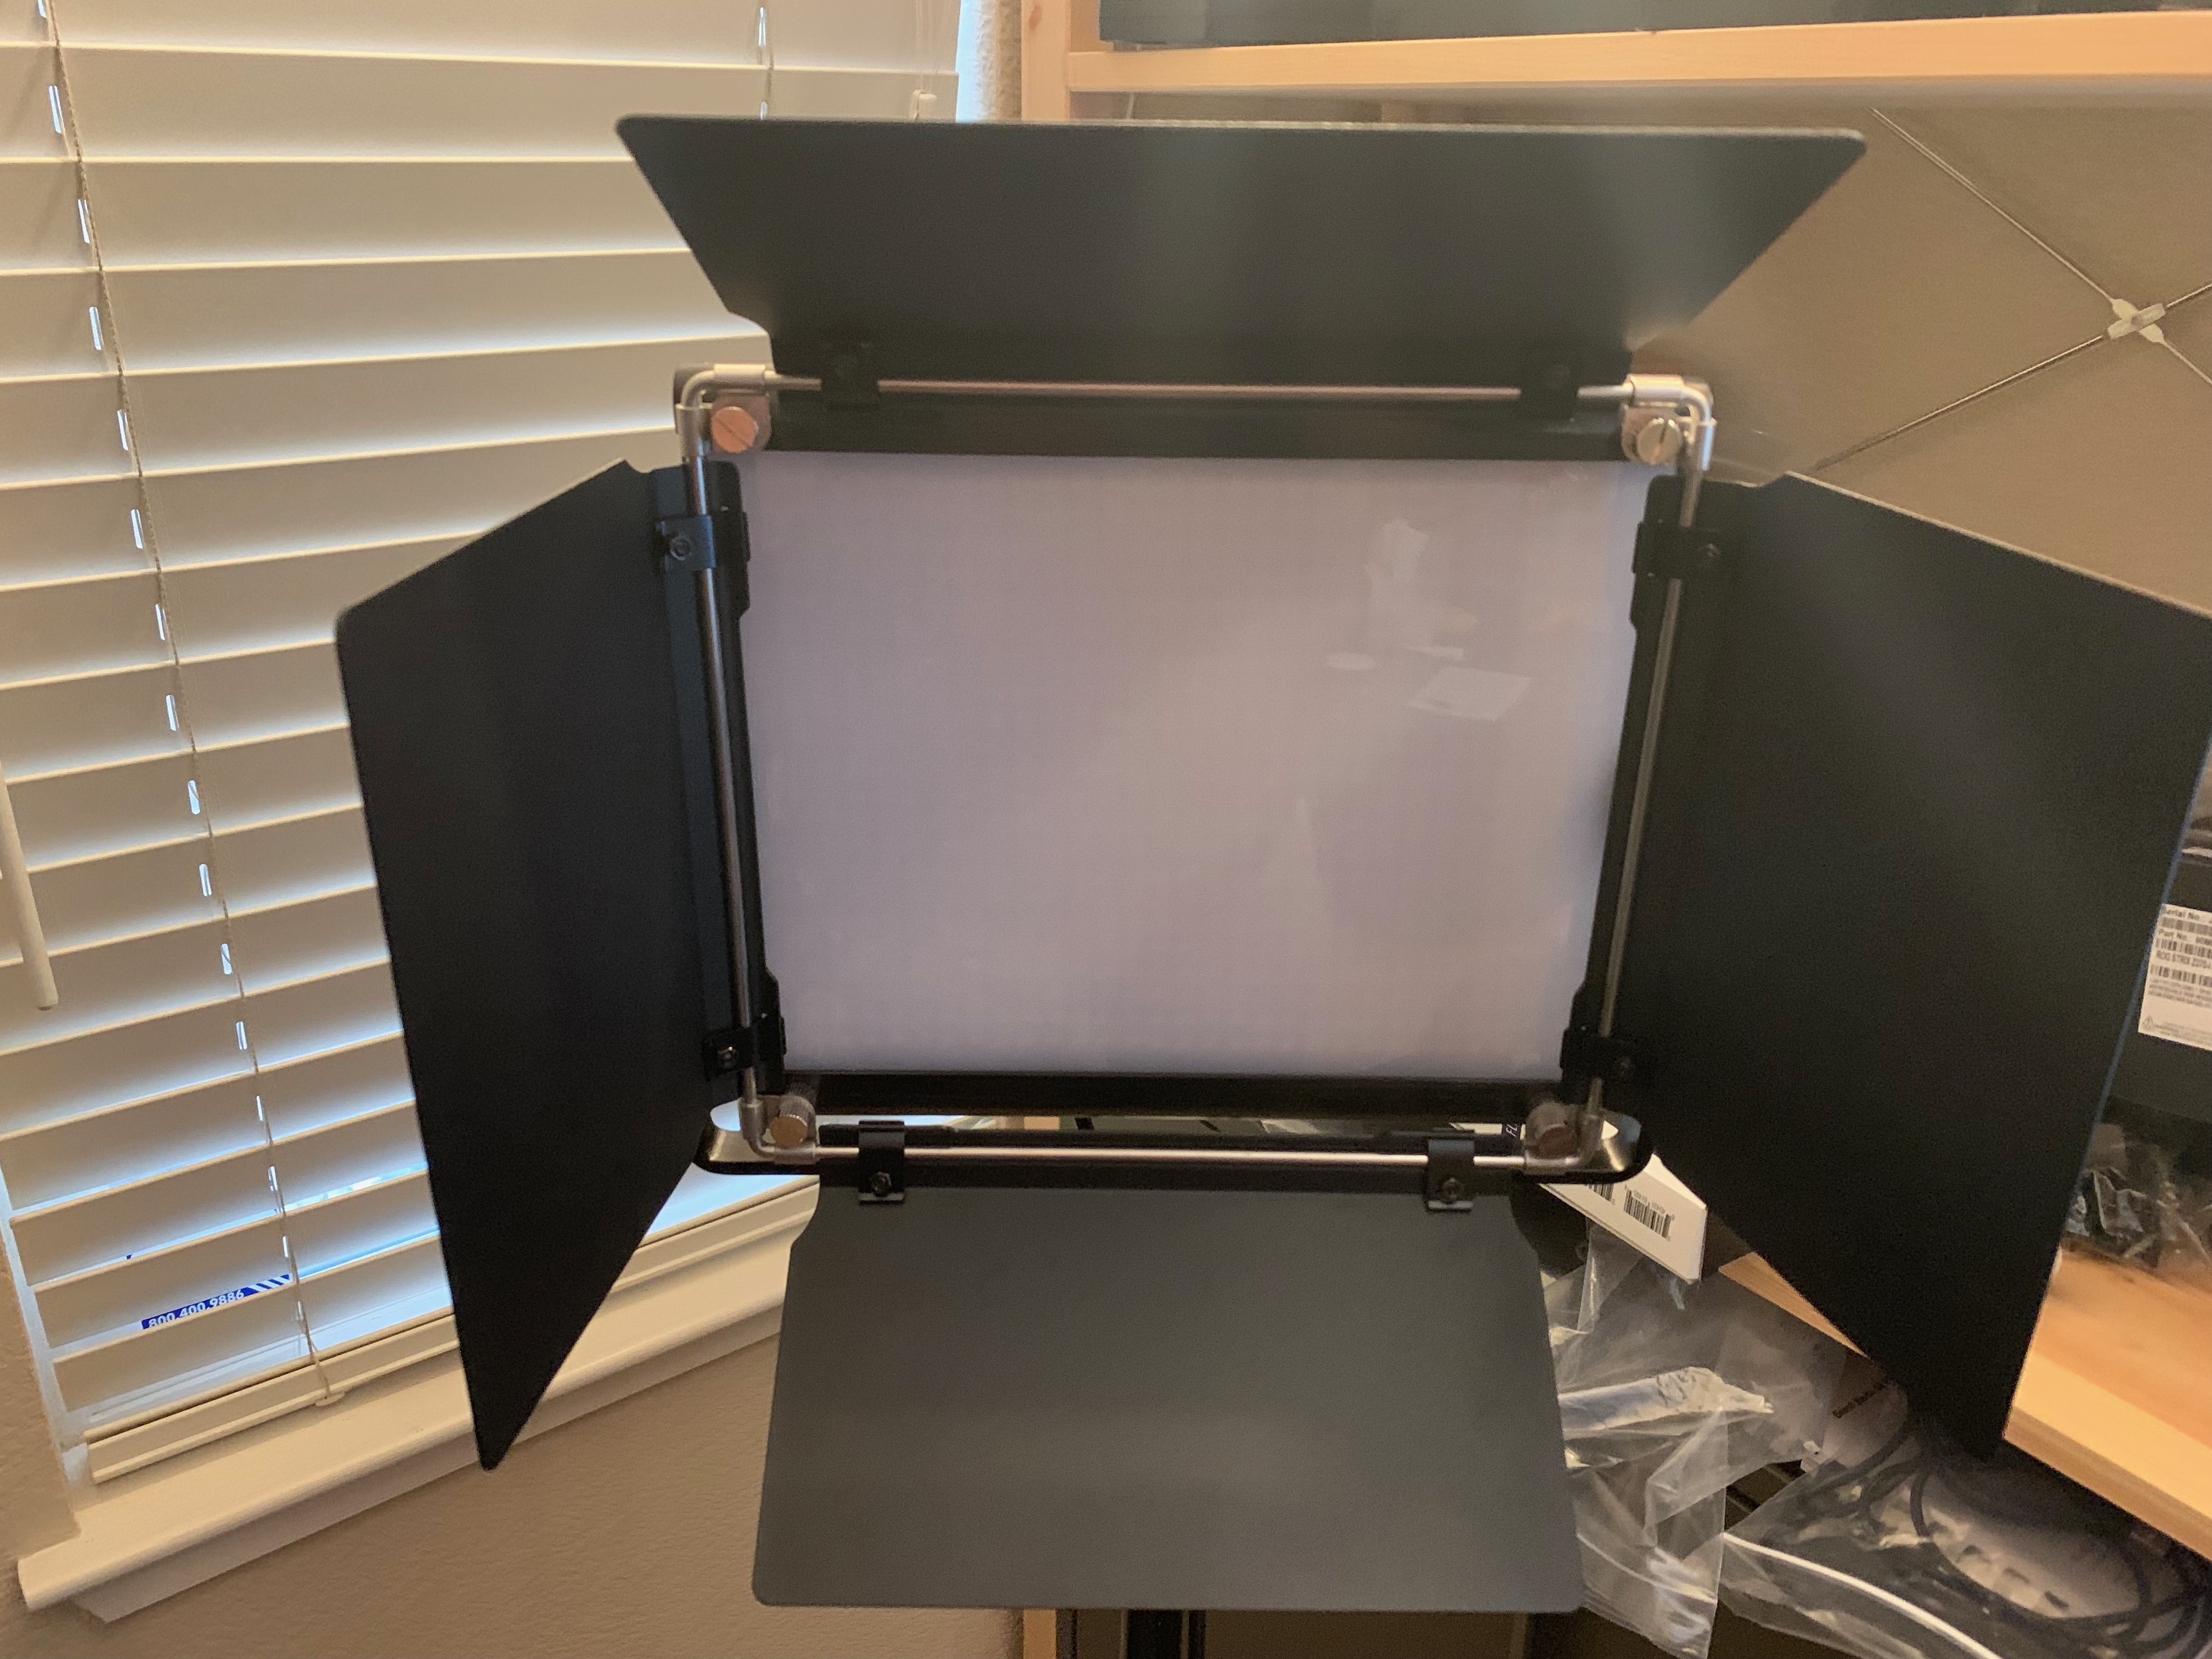
For the green screen, the key point is to light it evenily: you’re fighting room lighting, and the face lighting - you’ll be adding shadows now. I’m solving this with the Neewer LED panel kit and two D-Fuse softboxes. The kit includes two bi-color panels, each with a full-height stand (I’m using them at around half of their maximum height), barn doors, a built-in diffuser pane, and a carry bag.
I’m running these with the white at roughly half power, and the yellow completely off:

If it’s dimmer, shadows become a problem; if it’s brighter, the diffuser isn’t effective enough at short range, so you get bright spots. It’s important to get them as far away from the green screen as you can, but you can still get acceptable results if they’re less than 30 inches away.
The softboxes just spread the light out more. I like these ones because they’re really easy and fast to set up and pack away: the depth is provided by bars that snap in two, and link magnetically: this effectively means you need to fold up a square rather than a cube when you’re done.
To adjust the chroma key:
- set the white balance for your camera to match the lights you are using
- don’t use the built-in “green” option in OBS or XSplit; pick the color from your screen, when you’re sitting in the chair. The screen won’t be entirely perfectly lit, so try to pick a color that’s roughly half way between the brighest and darkest bit
- set smoothing and anti-aliasing options to 0
- set the threshold to zero (or sensitivity to max); slowly bring it up until the background is consistently gone
- move it further until it starts to pick up your face, then pick a final value a safe distance between those two points
- gradually increase smoothing settings until you get something that looks good for you
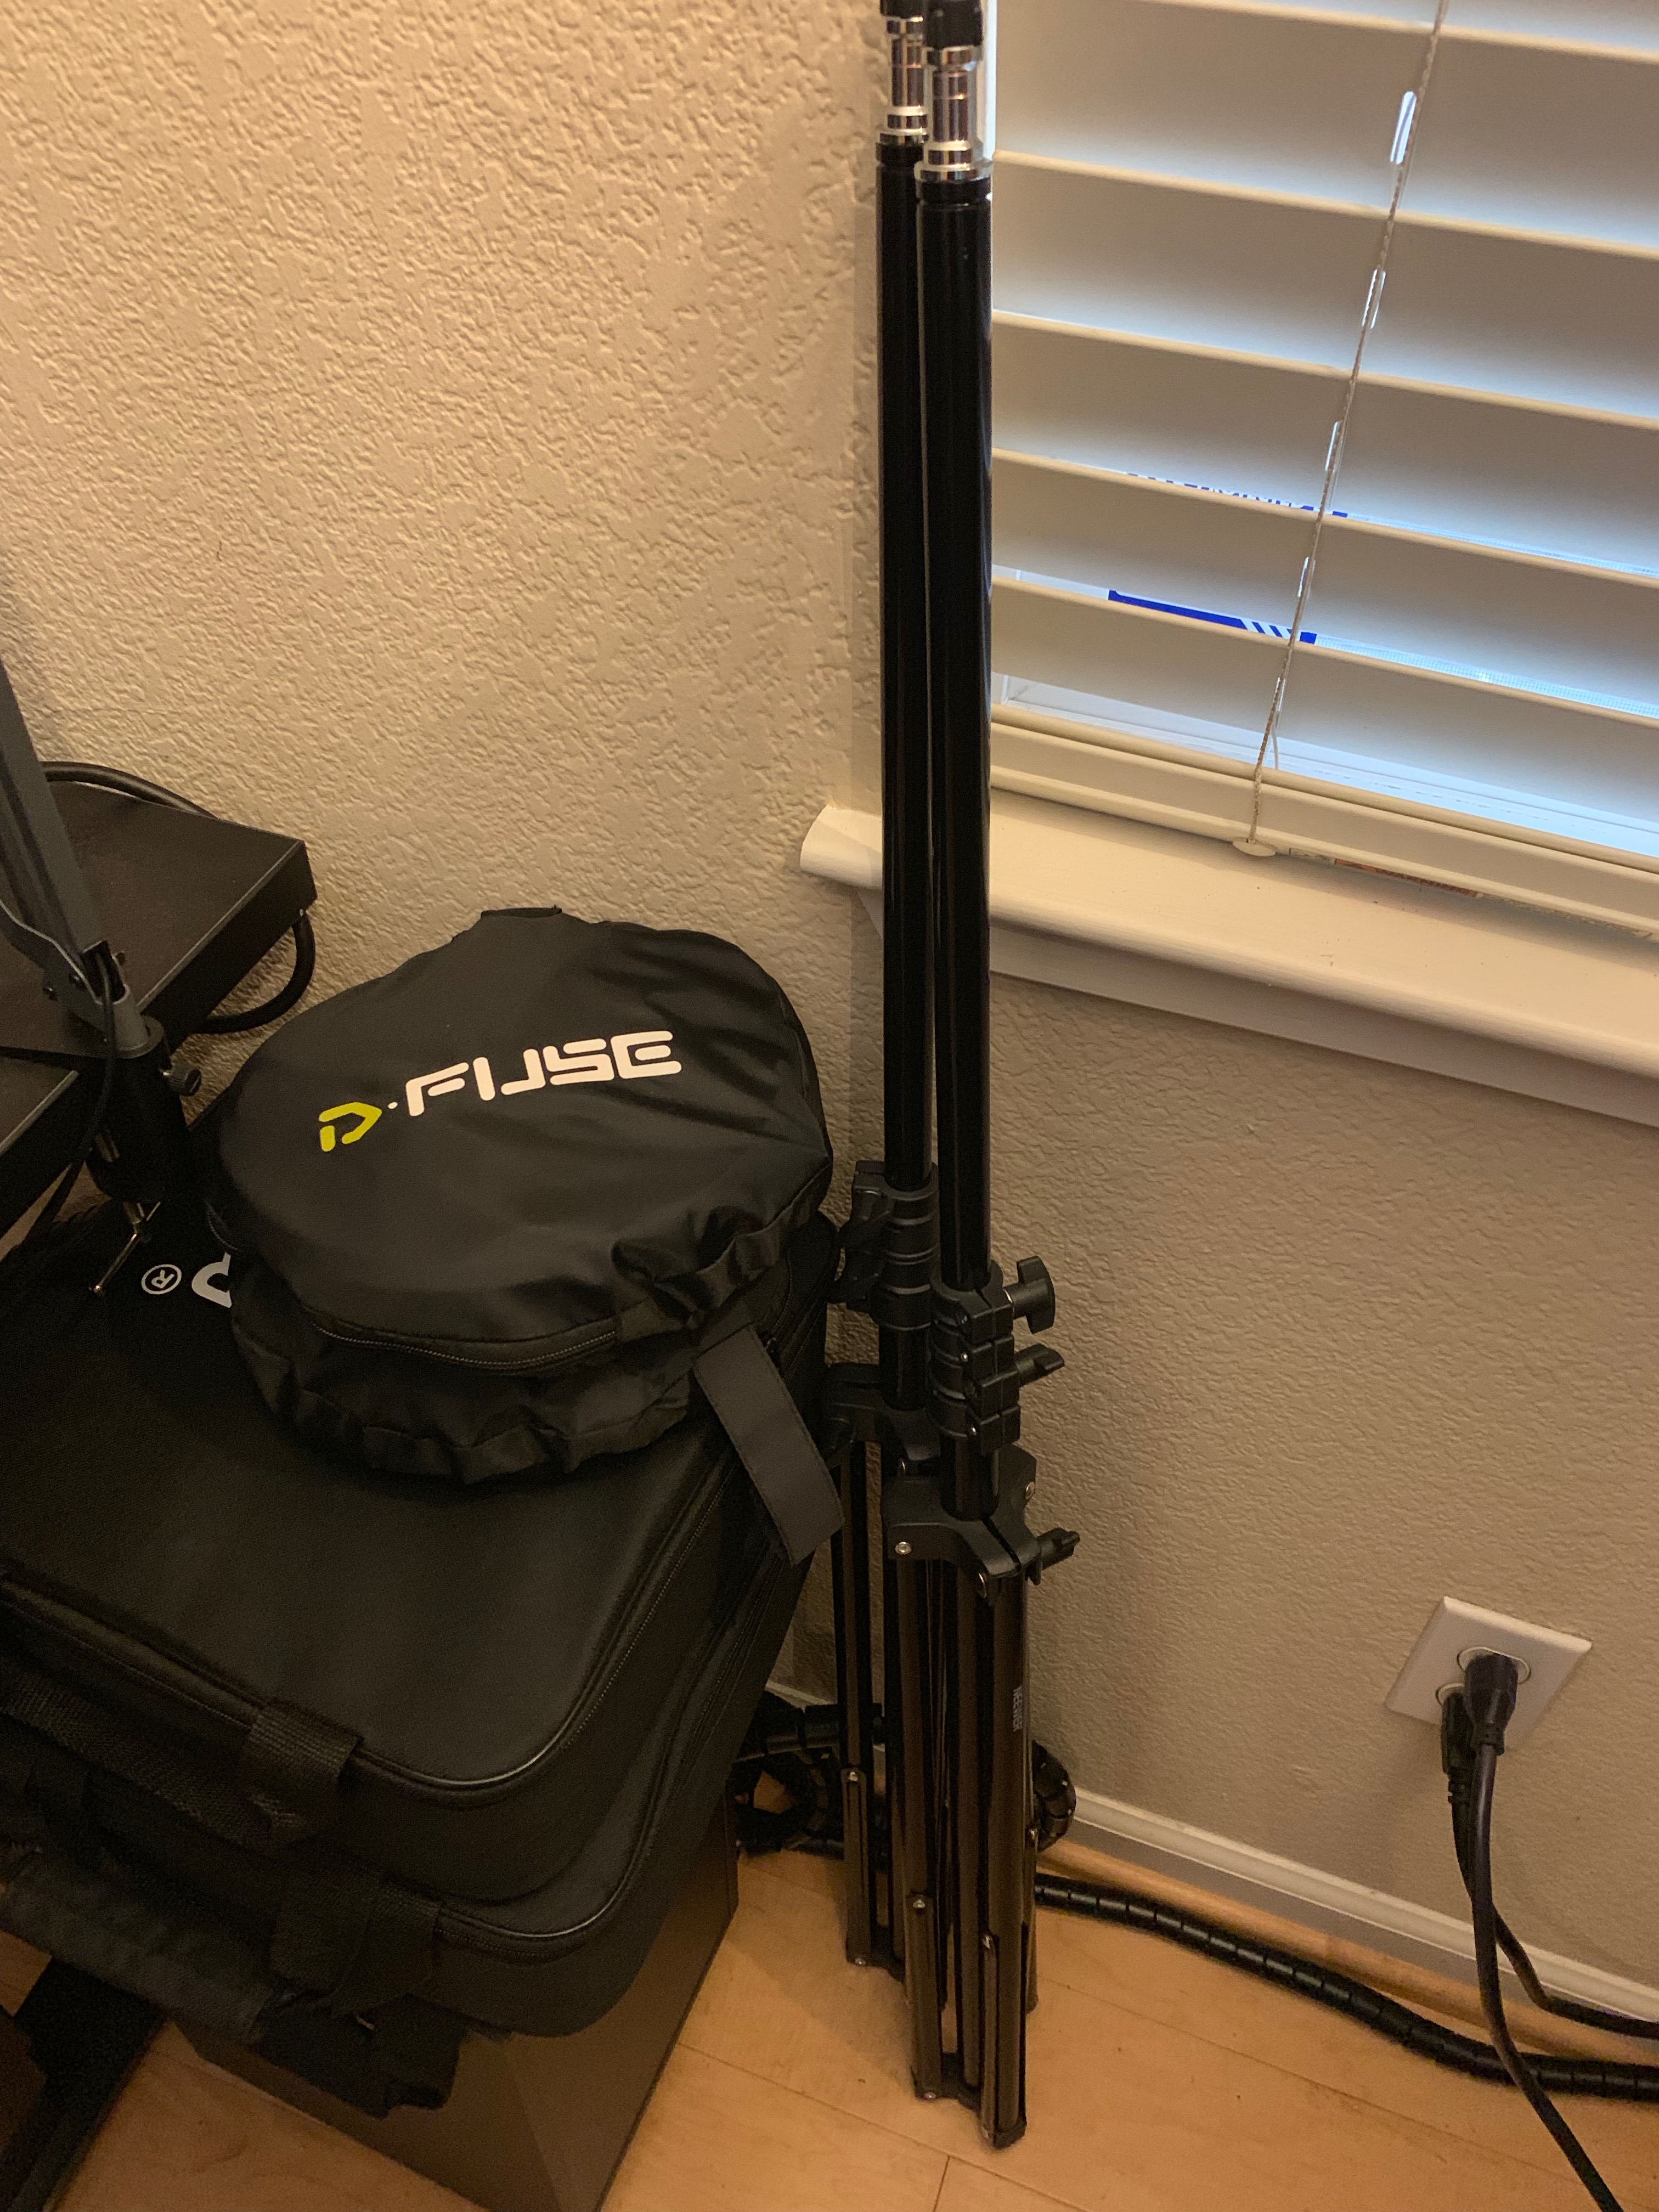
The full set (tripods, lamps, defusers, green screen) takes less than 5 minutes to set up and put away, and takes up very little space; here’s the LED panels, defusers, and tripods next to my subwoofer:
If you’ve got questions, I’m happy to answer them as well as I can on Twitch, and I hope this was helpful.